As we saw in the article on how to do staking on NIX, in addition to staking, there is another way to obtain a return on investments made on NIX. This approach is through LPoS contracts, in this tutorial we will see step by step how benefit from them.
Thanks to LPoS contracts, NIX holders will be able to delegate their staking rights to a third party, this third party will be responsible for staking and will report benefits in exchange for a small commission.
The difference between staking directly from NIX wallets or doing LPoS, is that through direct staking, the benefit obtained is 100% for the one who performs it, but it is necessary to have a computer on constantly. On the other hand, when doing LPoS, it is not necessary to have a computer consuming energy, since this work is carried out by the person to whom the staking rights are delegated.
How to make LPoS Contracts?
With the NIX QT Wallet
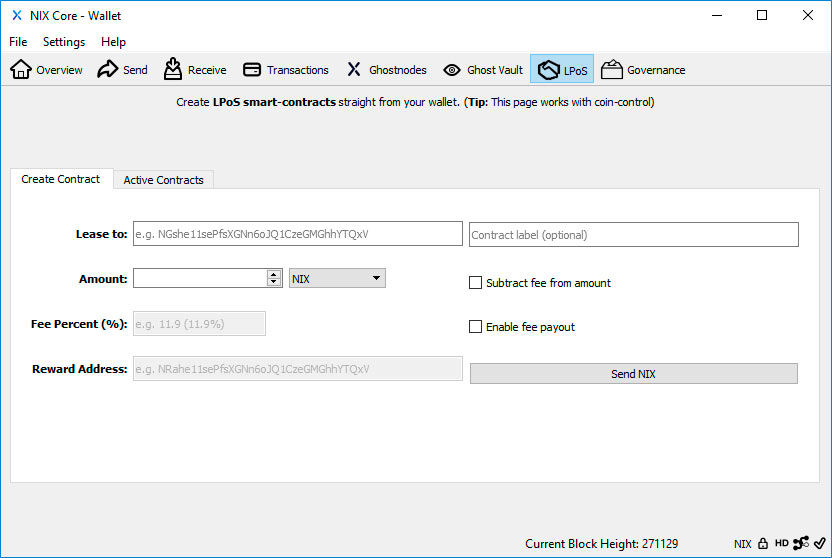
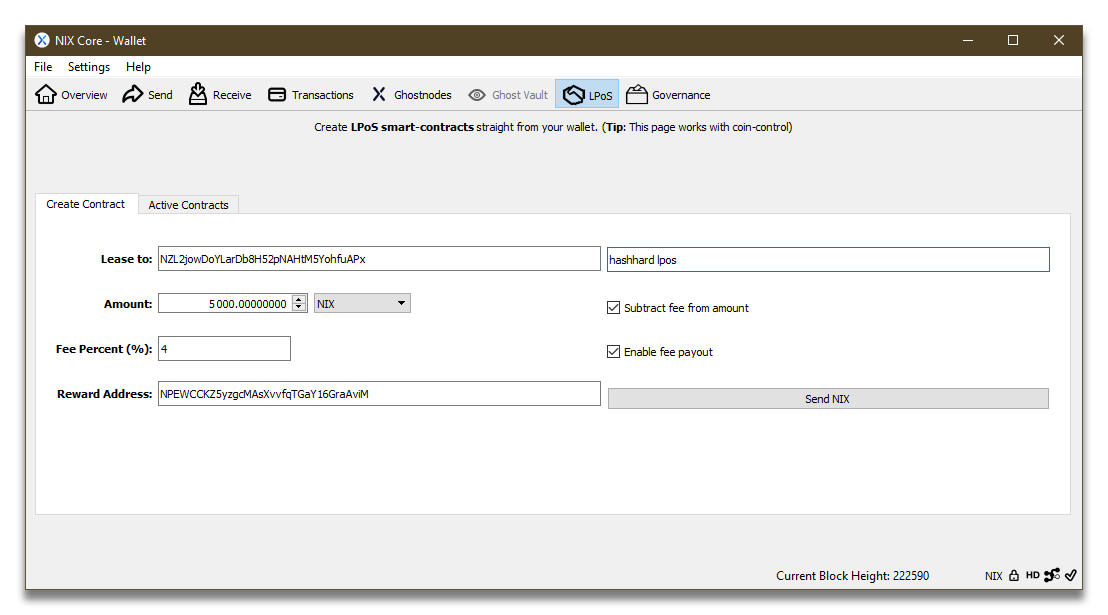
Open your NIX Core Wallet and go to the LPoS tab.
Before making an LPoS contract we will see the fields that should be filled in and if it is you or the merchant who must provide them.
-
Lease to: External address to which you can staking with your currencies, is supplied by the merchant.
-
Contract Label: Label with which you can identify the contract in the ‘Active Contracts’ tab.
-
Amount: Amount of NIX with which you want to stake.
-
Fee Percent: Reward assigned to the leasing merchant. This information is provided by the merchant. If the rate is greater than zero, check the “Enable fee payout” box to enter the appropriate percentage.
-
Reward Address: Merchants address for their share of the participation reward. This address is supplied by the merchant.
As you have seen, the only data that you can freely put is the label to be able to identify the contract and the amount of NIX with which you will be staking, the rest is supplied by the merchant. These merchants can be located in the NIX marketplace.
The page shows a list of merchants that offer products and services related to NIX, you just have to select the one that offers the best benefit and on your page it will show the data that you must fill in to make the LPoS contract.
Example:
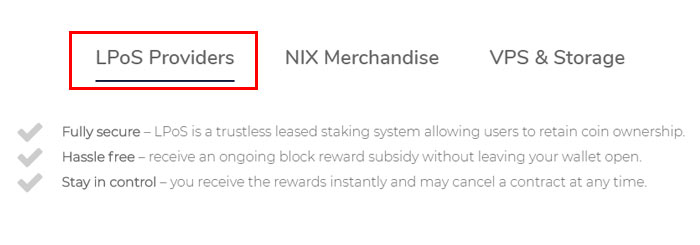
We enter the NIX marketplace and choose the LPoS Providers option.
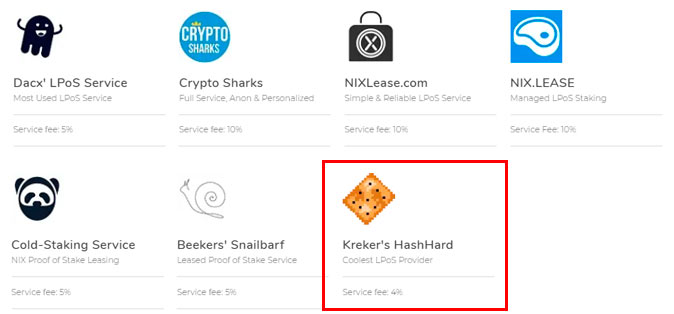
Among all the suppliers we choose the one that best suits our needs, in this example we have chosen Kreker’s HashHard, since it currently has the lowest commissions. (Crypto Economy has no relationship with this provider).
By clicking on its link, you will be taken to a page that shows the necessary data to enter in your LPoS contract.
You just have to fill in the data as indicated by the provider and press Send NIX.
With the NIX GUI Wallet
As we explain in the article on NIX wallets, the GUI Wallet has a much more visual interface focused on the user experience, so creating a contract in this wallet will be a quick and simple process.
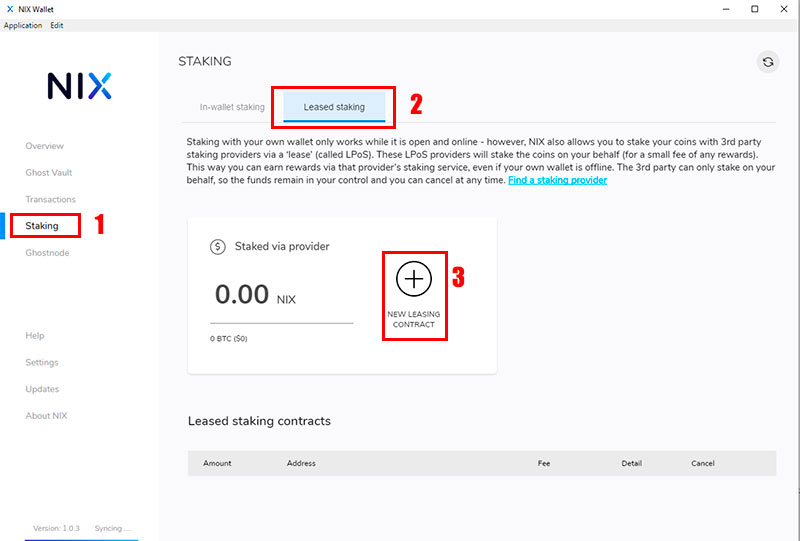
Once we have opened the wallet, to create a new LPoS contract we must follow the following steps:
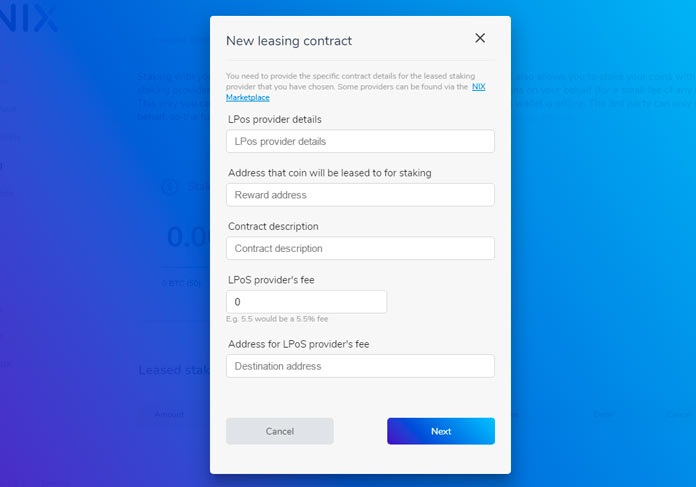
Press Staking (1), then go to Leased Staking (2), and create a New Leasing Contract (3), a window will open where you must enter the data offered by the merchant.
In this example we will choose the same merchant that we choose for the QT Wallet.
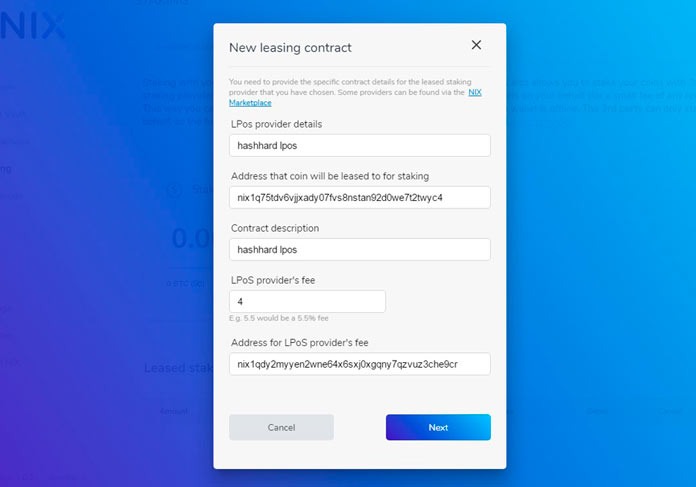
As in the previous example, the merchant shows the data that must be entered to complete the LPoS contract.
Once you have entered the information provided by the merchant, press the NEXT button.
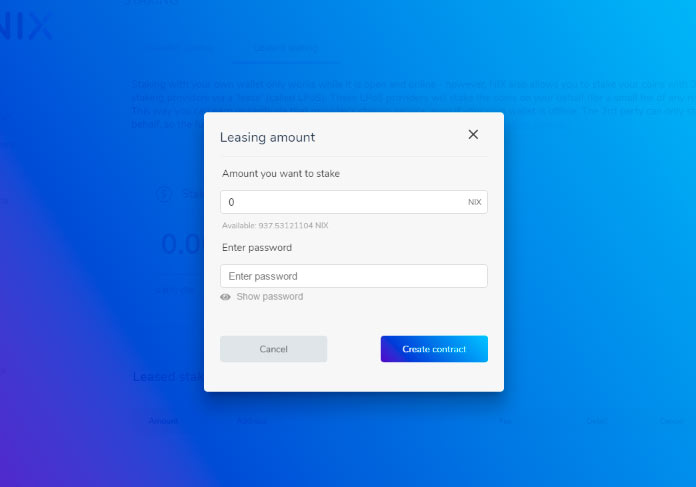
To finalize the contract and begin to obtain a performance, you only have to indicate how many NIX of those you have stored in your wallet you want to delegate.
In the next box enter the password of your wallet, and then complete the contract by pressing “Create Contact“.
Follow these steps and start earning passive income with NIX!
https://www.youtube.com/watch?v=ZcZyouK7svs
If you have any questions or problems during the process, you can get more information on the official NIX platform wiki, you can also contact the NIX team on their Discord.


